

|
|
[3 of 5] |
| ||||||
|
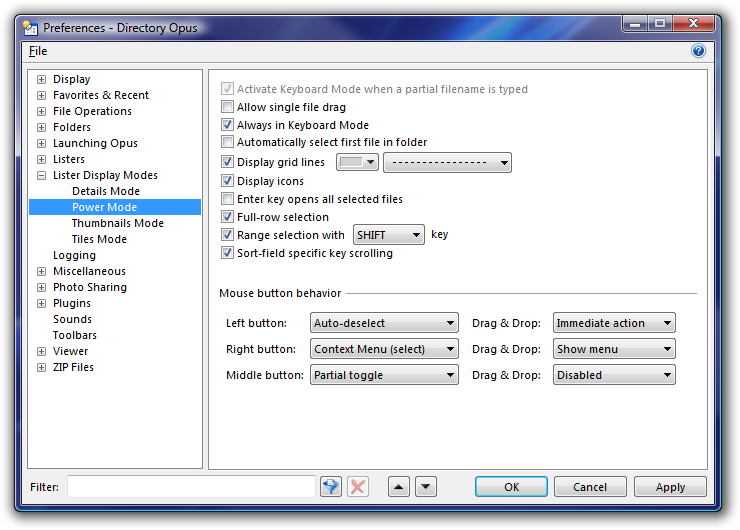 |
| The Preferences window. |
|---|
A common criticism, especially from new users, is that there are so many options in Opus that it's hard to find the right one when you need it. Opus 9 tries to help in a few different ways.
The Preferences window now has a filter at the bottom. Type something into the filter and the Preferences pages which don't contain what you typed are hidden while the matching items on the remaining pages are highlighted by red boxes.
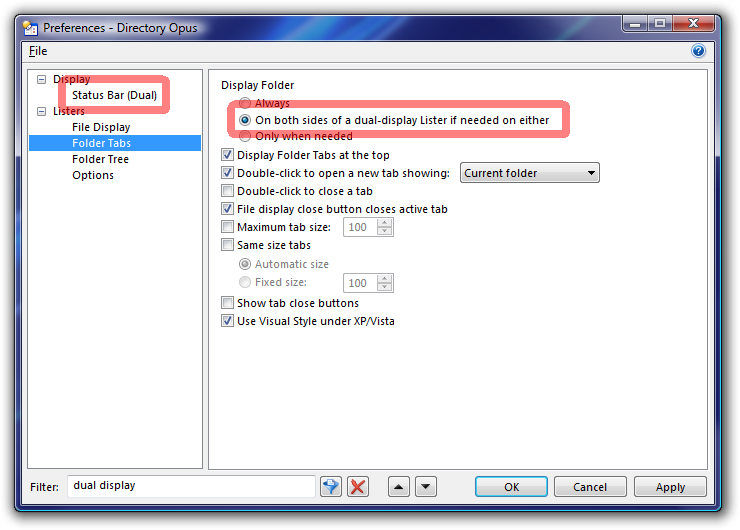 |
| Preferences filtered for options related to "dual display". |
|---|
When filtering, the up/down buttons make it easy to cycle through all of the matches without having to click all over the place. When not filtering they provide a convenient way to browse through the different Preferences sections.
Many of the options have been reorganised into a more logical structure. For example, most cosmetic options are grouped into the Display category rather than mixed in with behavioural settings.
Options to do with Startup, Default Listers and Layouts have been refined, simplified and reorganised.
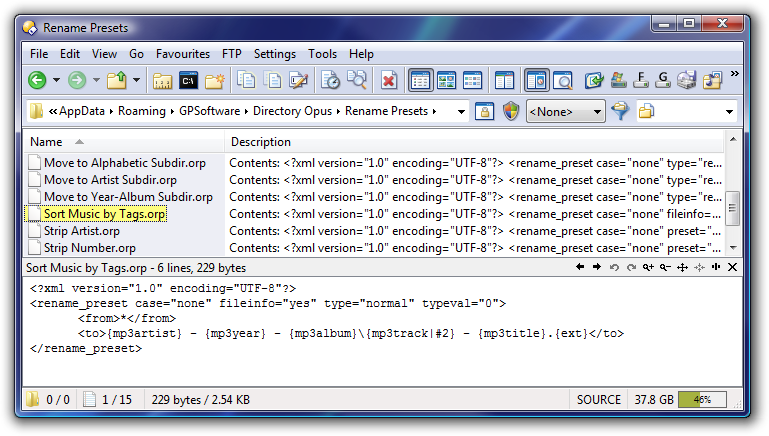
Saved Filters can now be managed via the Preferences window. Filters -- not to be confused with the filter for the Preferences window itself -- can be used with various file management tasks including searching, selecting, synchronizing, copying and deleting. You can still edit Filters in the old ways, like directly in the advanced Find panel, but now there's a central location for editing them as well.
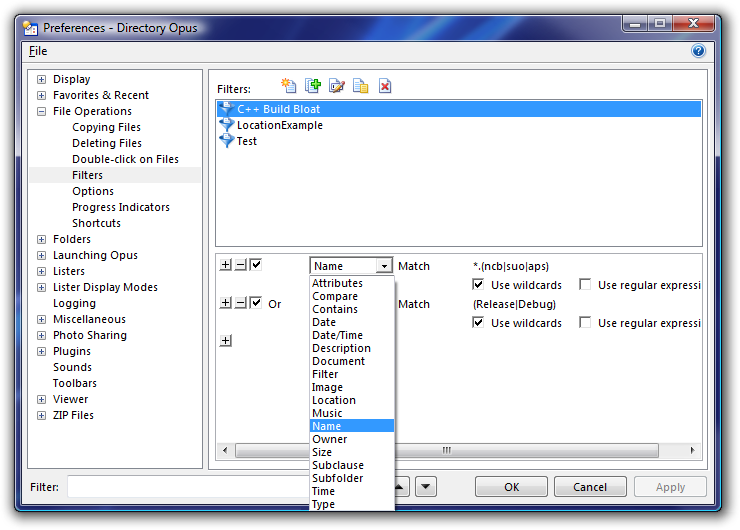 |
| Saved Filters can be edited via Preferences. |
|---|
It's now easier to change the fonts Opus uses and the File Display Border font can now be changed.
You now have greater control over the colors used for different files and folders. For example, System files and folders used to share the same color settings but now they can be configured separately.
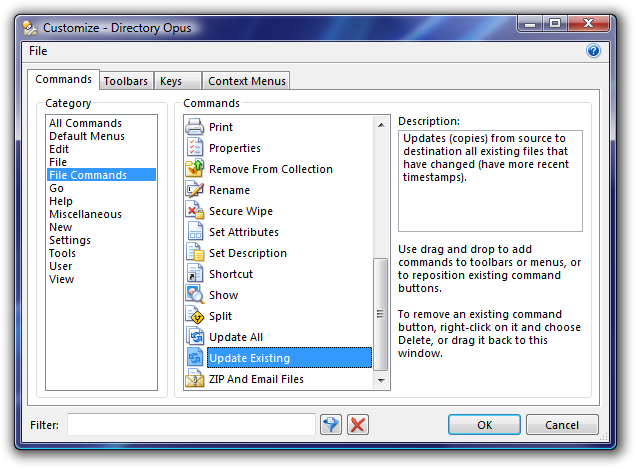 |
| The Customize window. |
|---|
The Customize window has a filter at the bottom like the one in the Preferences window. This filter works differently depending on the selected tab:
On the Commands tab you can type words in to find related commands.
On the Hotkeys tab you can push qualifier keys (Alt, Shift, Ctrl) and/or letters to see the hotkeys which include the things you pushed.
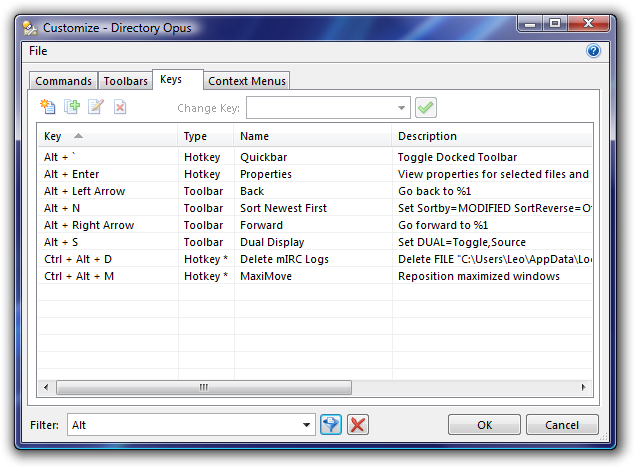 |
| Hotkeys, filtered to show only those involving the Alt key. |
|---|
The list of Hotkeys can be exported to a text or CSV file that you can then print out as a reference.
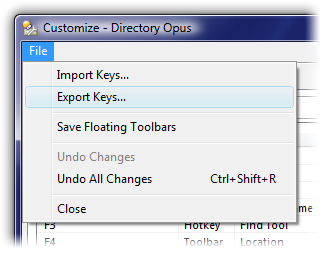 |
| You can export and print a hotkey reference. |
|---|
Esc, Tab and Enter can all be used in hotkeys now. If you click the arrow on the right of hotkey fields a menu pops up which allows you to add them to your hotkey, since pressing the actual keys would cause the dialog to close or move to a different element.
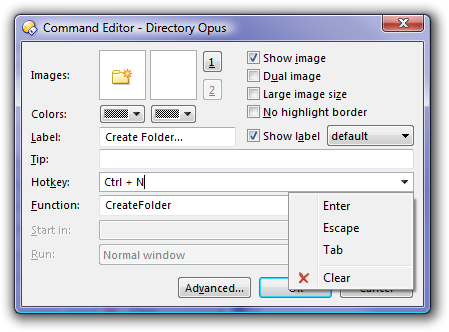 |
| Hotkeys can use Esc, Tab and Enter. |
|---|
If you're an Opus 8 user then you have probably already noticed the new icons from the screenshots so far.
There's more to this than prettier graphics, though. Opus 9 has a new Icon Set system that makes it easy to add or substitute icons made by other people.
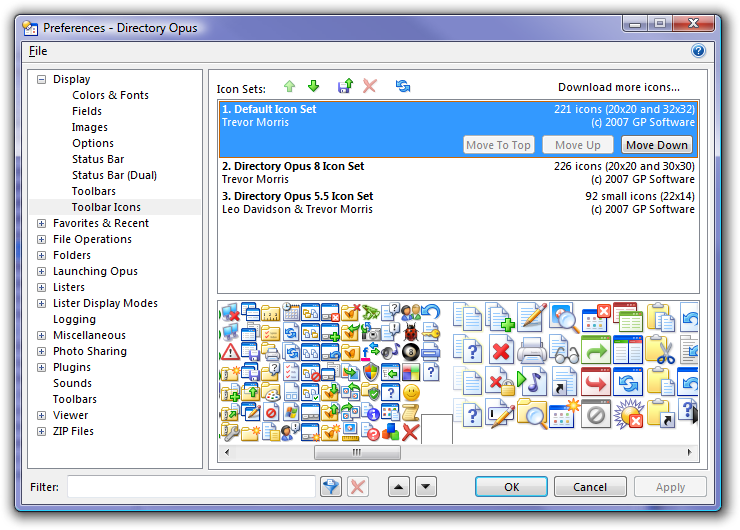 |
| Icon sets are managed via Preferences. |
|---|
Icon sets are easy to make and come packaged as a single file that you can download and install with just a few clicks.
Every icon now has a name and can be given a category.
When choosing an icon you will, by default, be shown a list where each named icon appears only once. For example, if two sets have a Copy icon then only one of those Copy icons will be shown by default. When one icon set is higher up the Preferences list than another its icons will take priority.
If you re-order the icon sets in Preferences your toolbars will automatically reflect the new icon priorities.
You can also ask Opus to show you all of the icons in all sets, including those with duplicate names, or to show you the icons from just one specific set. If you choose an icon in this way then it will not be overridden by different icon sets. This makes it easy for you to use a couple of icons that you like in one set while overriding the rest of them with another set.
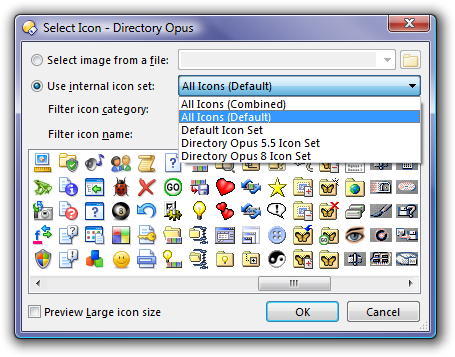 |
| You can browse combinations of icon sets or limit your view to just one. |
|---|
The list of icons can also be filtered by category, for example if you only want to see icons related to Navigation or FTP. Downloaded icon sets can add new categories if they wish.
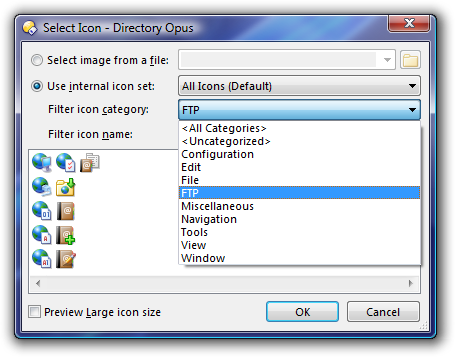 |
| Icons can be browsed by category. |
|---|
An alternative way to quickly find an icon is to type part of its name into the filter field. Icons that don't match will be hidden.
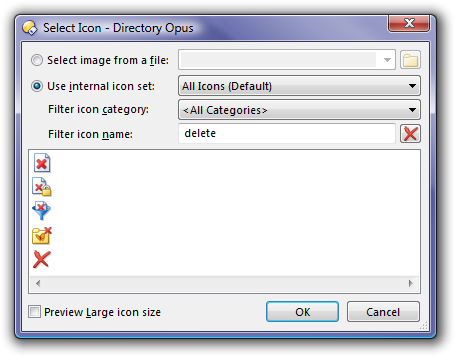 |
| Icons can be searched by name. |
|---|
Icon sets can override existing icons but they do not have to. They can add completely new icons, or override just a few icons, or do a combination of the two. For example:
One icon set might add new icons for a special purpose, such as icons which represent different ways of writing to optical media. These icons would appear in addition to the existing internal icons.
Another icon set might override all of the existing internal icons, replacing them with a different style. All toolbar buttons which used the internal icons would be changed by installing this new set and moving it to the top of the list.
Yet another icon set may only override a few of the internal icons. For example, if someone doesn't like yellow folders then they could make an icon set which replaces all of the icons which feature folders with differnet ones. Installing this set would change those icons on all toolbars but leave the other icons alone.
Icon sets are really easy to make as they're just Zip files with images and some simple XML inside. 32-bit PNG images with alpha channels are supported, allowing your icons to have smooth anti-aliasing or shadow effects on any background.
The old icons are still available if you prefer them.
You can still refer directly to individual icon files in .ico, .bmp, .png, .jpg, etc. formats if you want to, as well as to icons inside any program's Exe or DLL files.
Opus no longer stores settings in the Registry. Everything is stored in XML files now.
The ability to run from USB, discussed below, was the driving factor behind this change but there are a few bonus benefits.
If you really need to, the configuration is easier to backup or edit by hand.
The oft-overlooked Backup & Restore wizard has been streamlined and remains the easiest way to do a full config backup.
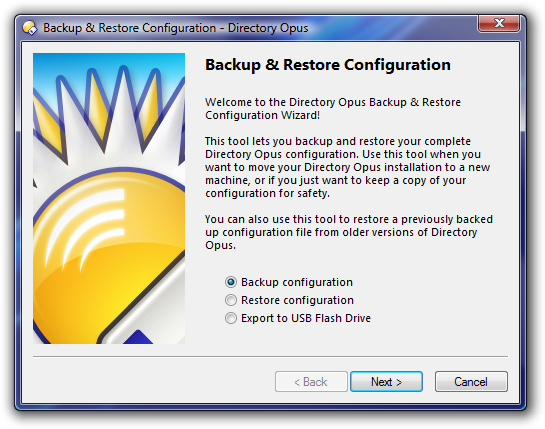 |
| Backup & Restore Configuration Wizard. |
|---|
The new configuration system is better for multi-user machines. For example, Opus-specific filetype changes are stored per-user (unless the shared configuration mode is switched on).
Settings from previous versions are converted automatically.
 |
| Configuration that was in the Registry is now in XML files. |
|---|
You can copy Opus to a USB flash drive or memory card that you can carry around to use on other people's computers.
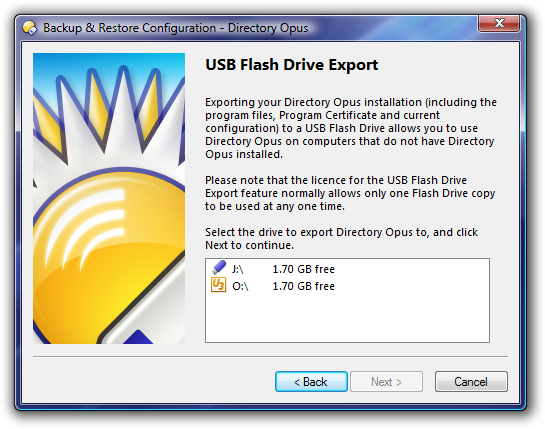 |
| You can export your Opus setup to a USB flash drive in a few clicks. |
|---|
All of your settings are exported to the USB stick along with Opus itself. When you run Opus from the USB stick it load copies of the same toolbars and Preferences that your normal installation would use.
You can run Opus directly from a USB stick without changing anything on the computer you are using. Nothing needs to be installed and no Registry changes are required.
Changes to the Opus configuration get saved back to the USB stick.
There are two different ways to export Opus to a USB flash drive:
A generic method allows Opus to be exported to almost any type of flash drive. A DOpus.exe launcher is copied to the drive along with a DOpus directory containing your settings and the rest of the program. When you want to run Opus on another computer you simply insert the flash drive and double-click DOpus.exe.
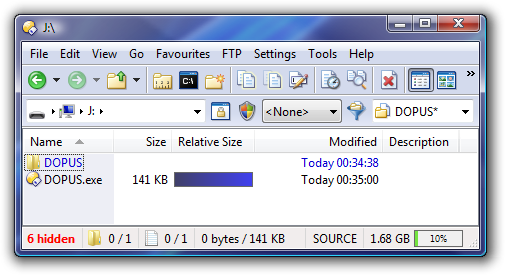
After exporting you simply run DOpus.exe directly from the flash drive. If you have a flash drive which supports the U3 system for portable applications then you have the option of exporting Opus and your settings to a .U3P package file. Such a package can be copied to your flash drive, added to the U3 launch menu and then used in the same way as other U3 applications.
Of course, if you have a U3 drive then the generic option remains open. You are free to choose whichever method best suits you.
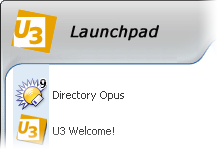
The U3 system is also supported.
As mentioned in the Folder Tabs section, a new option for Explorer Replacement mode opens double-clicked folders in new tabs instead of new windows. So many people have asked for this that it's worth mentioning twice.
Explorer Replacement is now a per-user setting, rather than per-machine.
You can now tell Opus to exit when all of its windows are closed.
 |
| Opus doesn't have to run in the background. |
|---|
The ability to open Opus by double-clicking an empty space on the desktop now works even when Opus isn't running in the background.
(If you use global hotkeys or floating/docked toolbars then you will still want to keep Opus running in the background. Ditto if you want new listers to open as quickly as possible.)
| << Page 2 << | Page 3 of 5 | >> Page 4 >> |